I have a couple of ideas in mind that involve connecting an ADALM-Pluto SDR to a phone or tablet. Usually, the Pluto is connected to a PC through USB, and the Pluto acts as an Ethernet device, so that network communications between the PC and Pluto are possible. I want to have the same thing running with my Android phone, which is an unrooted Xiaomi Mi 11 Lite (model M2101K9AG, if anyone is curious).
As usual when trying to do something slightly advanced with Android, this hasn’t worked on the first go, so I’ve spent some time debugging the problem. Long story short, in the end, the only thing I need to make this work is to run
# fw_setenv usb_ethernet_mode ecm
# fw_setenv ipaddr 192.168.89.1
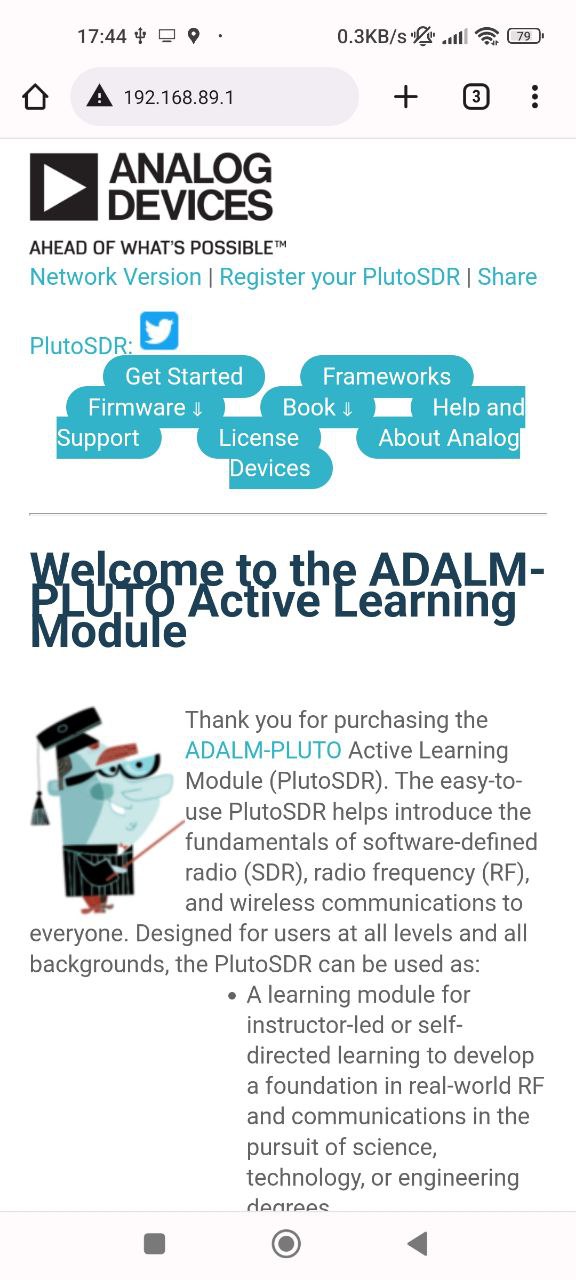
on the Pluto once and reboot (these settings are saved as uBoot environment variables to persistent storage), then enable Ethernet tethering on the phone every time that I connect the Pluto. I can go to the web browser in the phone and check that I can access the Pluto web server at 192.168.89.1.
Hopefully the rest of this post will give useful information about how everything works behind the scenes, as your mileage may vary with other Android devices (or if you try with an iOS device, of which I know next to nothing).
I haven’t seen many people doing this, so the documentation is scarce. PABR did a set up with LeanTRX, the Pluto and an Android phone, but they were running the Pluto in host mode and the Android phone in device mode, and I’m doing the opposite. Note that when you connect a Pluto and phone together, the roles they take will depend on the USB cable. My phone has USB-C, so I’m using a USB-C plug to type-A receptacle cable (USB-C OTG cable) together with the usual USB type-A plug to USB micro-B plug cable (the cable provided with the Pluto). There is also this thread in the ADI forums, but it doesn’t really say anything about Ethernet over USB.
The ADALM-Pluto, as any other embedded Linux device, uses the Linux USB Gadget infrastructure to work as a USB peripheral when it is connected to a USB host such as a PC. Different kernel modules implement different kinds of USB devices, and the Pluto comes already configured for Ethernet over USB, serial over USB, USB mass storage (i.e., a USB disk drive), and a protocol specific to ADI’s IIO. All of these can work simultaneously, so the PC sees the Pluto as a collection of several different devices.
There are several Linux gadget kernel modules that can implement Ethernet over USB. A list of them appears in this document, which shows how to test each of the USB gadget modules. The different modules or protocols available for USB over Ethernet are ECM, ECM subset, EEM, NCM and RNDIS. Each host operating system is compatible with only some of these protocols. Linux supports all of them, but other operating systems may need a specific protocol.
The ADI documentation for the Pluto gives a nice compatibility table that shows that Windows is only compatible with RNDIS, Apple devices need NCM, and Android, despite being a Linux variant, only works with ECM.
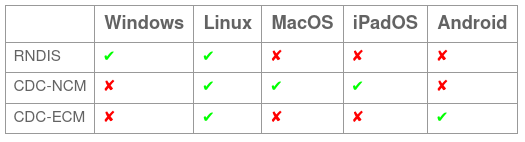
By default, the Pluto is configured to use RNDIS, but the same page gives instructions to easily change to NCM or ECM. Having this table earlier would have saved me a lot of trouble, but I only found this documentation after solving the problem in a more manual way.
I find that searching about technical documentation for Android is quite frustrating. Often you only find forum threads that don’t give the answers you’re looking for, and the details can depend on the phone model and ROM. So I began this task without any clear understanding of what Ethernet over USB protocols could work on my phone. My idea was to try all of them, just in case I got lucky.
These days, Linux USB gadget support is configured through configfs (beware of older documentation that refers to the kernel module g_ether and such). The kernel documentation describes how this works, and there is also this blog post that walks you through the details.
Working manually with this configuration on the Pluto requires a UART connection, since the USB shouldn’t be connected to a host while we change the configuration. The Pluto has a power-only USB connector that we can use for powering it from a PC or USB power supply while doing the tests.
There are test pads on the PCB for the UART TX and RX lines (see some PCB images showing these). These use 1.8V levels, so be careful about how you drive them. This is shown in the schematic below, where the UART_RX and UART_TX line go directly to the pin headers.
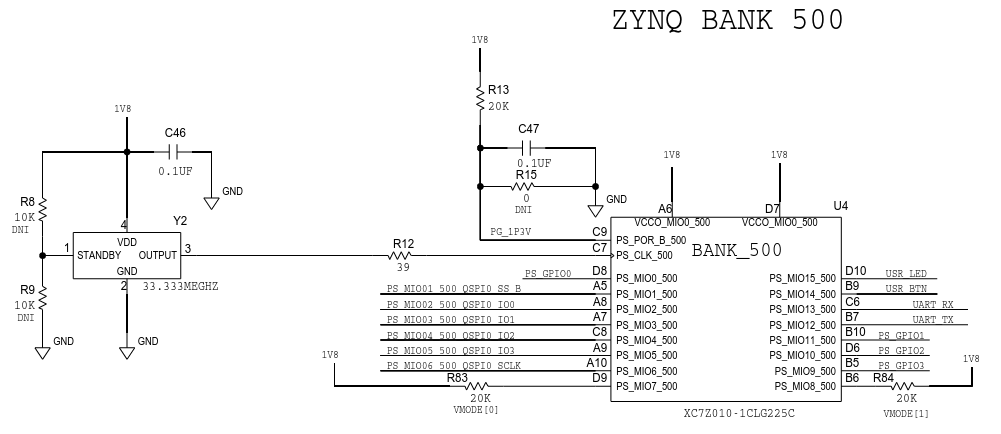
I am certainly not driving them in the best way, as I’m using the USB to 5V serial converter on an Arduino UNO board. The Pluto’s RX is connected to the serial converter through a voltage divider that has an open circuit voltage of 2.7V, and 2.2V when connected to the Pluto (so unfortunately we have some current flowing through the Zynq clamping diodes). The Pluto’s TX is connected directly to the serial converter.
The UART uses 115200 baud 8N1. I’m using picocom to connect to the UART from my PC:
$ picocom -b 115200 /dev/ttyACM0
The configuration of the USB gadget on the Pluto can be found in /sys/kernel/config/usb_gadget/composite_gadget. The first thing that we need to do to modify the configuration is to disable the USB gadget by doing
# cd /sys/kernel/config/usb_gadget/composite_gadget/
# echo "" > UDC
In the terminology of USB gadget, the different kernel modules or protocols that can be used are called functions. The functions that are enabled are given by symlinks in configs/c.1. They are the following:
# ls configs/c.1
MaxPower        bmAttributes    mass_storage.0  strings
acm.usb0        ffs.iio_ffs     rndis.0
A function can be disabled by removing the symlink. I tried removing the functions that I didn’t need, in case they were causing some conflicts with my phone. In the end, it turns out that I can leave all of these enabled. If you’re debugging, maybe you want to try removing all of the functions to begin with:
# rm configs/c.1/acm.usb0
# rm configs/c.1/ffs.iio_ffs
# rm configs/c.1/mass_storage.0
# rm configs/c.1/rndis.0
The functions that are loaded are given by directories in the functions/ directory. To load a new function, we create a directory inside functions/. This will load the kernel module for the function if required (in the Pluto all the functions are built into the kernel) and create some configuration files for the function. For Ethernet over USB functions, the most relevant configuration files are dev_addr and host_addr, which give the MAC addresses assigned to the device (the Pluto) and the host, and ifname, which lists the corresponding network interface name (this only gets populated after the USB gadget is enabled again).
We can load manually a new new Ethernet over USB function, such as ECM, as follows:
# mkdir functions/ecm.0
As shown in dmesg, this will assign random MAC addresses to the device and host. A possible pitfall is that it is possible that Android will not like these random MAC addresses, in particular if they don’t have the U/L bit set (see this stackoverflow answer). What happens then is that the network device usb0 will be created in Android, but it will not be renamed to eth0 by the udev rules, so Android will not know that it has a new Ethernet device. With a rooted phone I guess we could manually bring the usb0 interface up and assign it an IP address using the ip tool, but with an unrooted phone this is not possible.
We can assign well-formed MAC addresses however we like, or better, copy over the MAC addresses from the RNDIS function created by default by the ADI firmware. The firmware creates these unique MAC addresses from the Pluto serial number (which is actually the unique ID of the NOR flash). This is shown in the following snippet from /etc/init.d/S23udc
serial=`dmesg | grep SPI-NOR-UniqueID`
serial=${serial#*SPI-NOR-UniqueID }
[...]
sha1=`echo $serial | sha1sum`
[...]
host_addr=`echo -n 00:E0:22; echo $sha1 | dd bs=1 count=6 2>/dev/null | hexdump -v -e '/1 ":%01c""%c"'`
dev_addr=`echo -n 00:05:F7; echo $sha1 | dd bs=1 count=6 skip=6 2>/dev/null | hexdump -v -e '/1 ":%01c""%c"'`
To copy the RNDIS MAC addresses we do
# cat functions/rndis.0/dev_addr > functions/ecm.0/dev_addr
# cat functions/rndis.0/host_addr > functions/ecm.0/host_addr
Now we need to enable the ECM function in the configuration by creating a symbolic link:
# ln -s functions/ecm.0 configs/c.1
When we are happy with our USB gadget configuration, we can enable the USB gadget again. This is done by writing the name of the corresponding USB device controller to the file UDC. In the case of the Pluto, there is only one USB device controller:
# ls /sys/class/udc
ci_hdrc.0
So we can enable the USB gadget as follows:
# echo ci_hdrc.0 > UDC
Now we can check a couple of things to make sure that our configuration worked. If we look at dmesg, we can see the new network interface usb1 being created for our ECM function.
# dmesg | tail
usb0: MAC 00:05:f7:94:4b:91
random: dbus-uuidgen: uninitialized urandom read (12 bytes read)
random: dbus-uuidgen: uninitialized urandom read (8 bytes read)
random: dbus-daemon: uninitialized urandom read (12 bytes read)
random: crng init done
random: 1 urandom warning(s) missed due to ratelimiting
using random self ethernet address
using random host ethernet address
usb1: HOST MAC 00:e0:22:00:78:26
usb1: MAC 00:05:f7:94:4b:91
(the usb0 message and the random: messages are from when the Pluto booted up).
We can check that the usb1 interface exists with ip link. The interface has “no carrier”, because the USB is not connected yet.
# ip link
1: lo: <LOOPBACK,UP,LOWER_UP> mtu 65536 qdisc noqueue qlen 1000
    link/loopback 00:00:00:00:00:00 brd 00:00:00:00:00:00
2: usb0: <NO-CARRIER,BROADCAST,MULTICAST,UP> mtu 1500 qdisc pfifo_fast qlen 1000
    link/ether 00:05:f7:94:4b:91 brd ff:ff:ff:ff:ff:ff
3: usb1: <NO-CARRIER,BROADCAST,MULTICAST,UP> mtu 1500 qdisc pfifo_fast qlen 1000
    link/ether 00:05:f7:94:4b:91 brd ff:ff:ff:ff:ff:ff
Before testing on Android, I think it’s worth to test on a Linux PC to ensure that everything is working. In particular, I’ve found that if these configuration changes are done while the Pluto USB is plugged, then things will appear to work from the Pluto side, but the PC will not see the Pluto as a USB device even if it is unplugged and plugged again.
When testing on Android, it helps to use a terminal emulator app to see what happens. I’m using Termux. Additionally, typing from a PC with Remote Keyboard can be helpful. The first thing to watch out for is whether a new network interface appears in ip link when we connect the Pluto to the Android phone. This is shown below. The last interface, eth0, has appeared after we connected the Pluto.
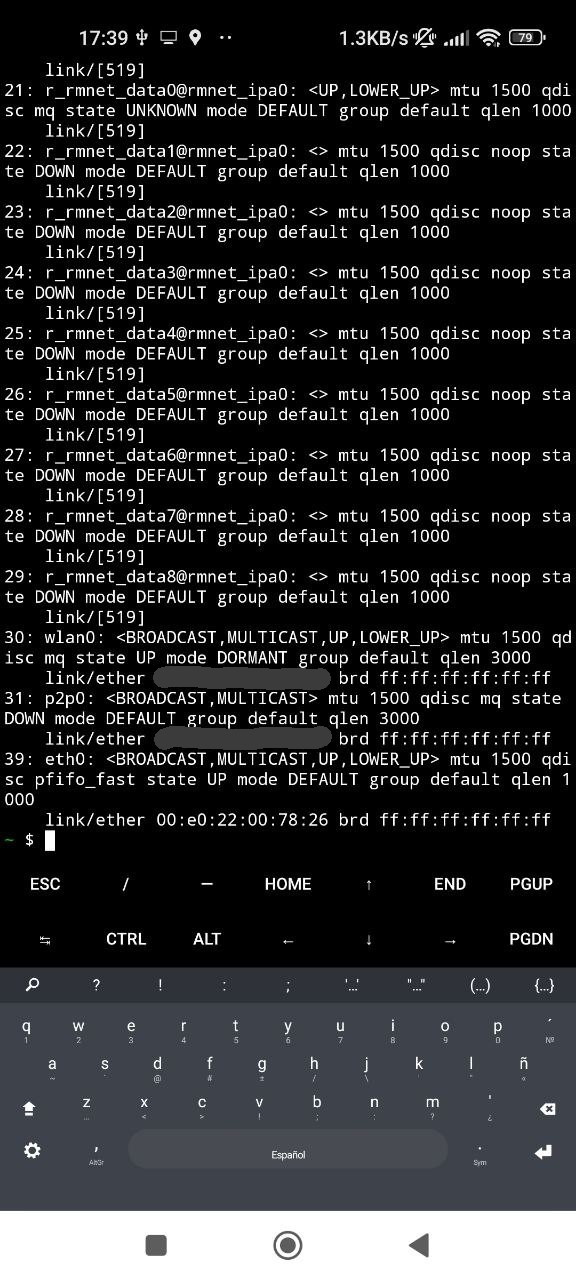
ip link in Android with the Pluto connectedI have observed that if we use NCM then the device usb0 appears, but it doesn’t get renamed to eth0 (so potentially NCM would be usable with a rooted phone, or if we manage to edit the udev rules), while with RNDIS and EEM no device appears, so I assume that support for these protocols is not included in the Android kernel of my phone (though I can’t access to /proc/config.gz without root access). With ECM and an appropriate MAC address, the device eth0 should appear, which makes Android aware that it now has an Ethernet device plugged in.
We can also verify things from the Pluto side by running ip link. We see that the usb network devices are now up, as the USB is connected. This happens regardless of whether Android is able to work with its side of the connection (note that the RNDIS usb0 is also up).
# ip link
1: lo: <LOOPBACK,UP,LOWER_UP> mtu 65536 qdisc noqueue qlen 1000
    link/loopback 00:00:00:00:00:00 brd 00:00:00:00:00:00
2: usb0: <BROADCAST,MULTICAST,UP,LOWER_UP> mtu 1500 qdisc pfifo_fast qlen 1000
    link/ether 00:05:f7:94:4b:91 brd ff:ff:ff:ff:ff:ff
3: usb1: <BROADCAST,MULTICAST,UP,LOWER_UP> mtu 1500 qdisc pfifo_fast qlen 1000
    link/ether 00:05:f7:94:4b:91 brd ff:ff:ff:ff:ff:ff
We need the eth0 device in Android to have an IP address. We can check whether it already has an IP address by running ip addr. If we had root access, we could use ip addr to give an IP address to eth0 manually. Without root access, we need Android to give it an address somehow. I think there are mainly two ways in which this can happen:
- If there is a DHCP server on the other end, Android will get its IP address from there.
- If we enable Ethernet tethering in Android, Android will assign an IP address to the Ethernet interface, and presumably run a DHCP server there.
If for some reason none of these two approaches work, I have observed that Android always assigns an IPv6 link-local address to eth0 (this is something that the Linux kernel does for each interface when IPv6 is enabled). IPv6 support is disabled in the Pluto kernel, but we could compile our own kernel with IPv6 enabled, and this would work for communications between the Pluto and the Android phone.
If we want to try using a DHCP server in the Pluto, there is already udhcpd installed and running. Its configuration is in /etc/udchpd.conf:
# cat /etc/udhcpd.conf
start 192.168.2.10
interface usb0
option subnet 255.255.255.0
As we see, it is configured to listen on the usb0 interface that gets created for RNDIS. If we want to make it listen instead in the usb1 interface that we have created manually, we can change this and restart the service. If we now unplug and plug the phone, and run ip addr in Android, we should see that the eth0 interface has an IP address.
40: eth0: <BROADCAST,MULTICAST,UP,LOWER_UP> mtu 1500 qdisc pfifo_fast state UP group default qlen 1000
    link/ether 00:e0:22:00:78:26 brd ff:ff:ff:ff:ff:ff
    inet 192.168.2.10/24 brd 192.168.2.255 scope global eth0
       valid_lft forever preferred_lft forever
    inet6 fe80::4f98:c07c:ed7a:4f6d/64 scope link stable-privacy
       valid_lft forever preferred_lft forever
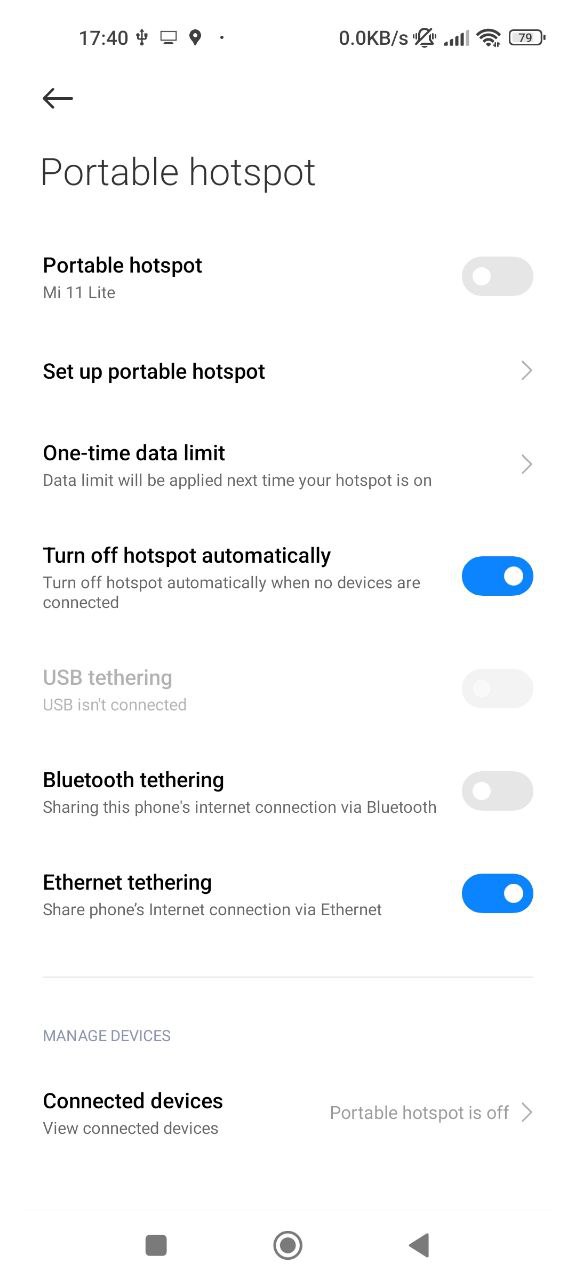
The second option is enabling Ethernet tethering. This has the potential advantage that if it works, then the Pluto will be able to access the internet through the phone. However, I think that not all the Android ROMs support this feature. In my ROM, it can be enabled in Portable hotspot > Ethernet tethering.
We can check with ip addr what IP address was assigned to eth0.
39: eth0: <BROADCAST,MULTICAST,UP,LOWER_UP> mtu 1500 qdisc pfifo_fast state UP group default qlen 1000
    link/ether 00:e0:22:00:78:26 brd ff:ff:ff:ff:ff:ff
    inet 192.168.89.206/24 brd 192.168.89.255 scope global eth0
       valid_lft forever preferred_lft forever
    inet6 fe80::4f98:c07c:ed7a:4f6d/64 scope link stable-privacy
       valid_lft forever preferred_lft forever
It seems that Android always assigns itself the same IP address when using tethering. Therefore, we can configure the Pluto with an IP address in the same range. This can be done with ip addr. For instance
# ip addr add 192.168.89.1/24 dev usb1
Now we can test that everything works by pinging the Android device from the Pluto, pinging the Pluto from Android, and accessing the Pluto HTTP server from Android. For instance, on the Pluto we can do the following (and similarly on Android):
# ping -c1 192.168.89.206
PING 192.168.89.206 (192.168.89.206): 56 data bytes
64 bytes from 192.168.89.206: seq=0 ttl=64 time=4.138 ms

--- 192.168.89.206 ping statistics ---
1 packets transmitted, 1 packets received, 0% packet loss
round-trip min/avg/max = 4.138/4.138/4.138 ms
In my case I found that when Ethernet tethering is used in Android, things work well. However, if instead I try using the Pluto DHCP server, then it doesn’t work. The Pluto is able to ping Android, but Android can’t neither ping the Pluto nor access its HTTP server. The routes in Android (printed with ip route) seem fine. Maybe there is a firewall problem, or maybe it has to do with the fact that I’m also connected to WiFi in Android. I didn’t investigate this further.
Now that we have found a configuration that works, we can automate it in the Pluto. In /etc/init.d/S23udc we can see that part of the script is responsible for creating the appropriate Ethernet over USB function. The function to use is read from a uBoot environment variable, as shown here.
USB_ETH_MODE=`fw_printenv -n usb_ethernet_mode 2> /dev/null || echo 0`

if [ "$USB_ETH_MODE" == "ncm" ]
then
	USB_NET_FUNCTION=ncm.usb0
elif [ "$USB_ETH_MODE" == "ecm" ]
then
	USB_NET_FUNCTION=ecm.usb0
else
	USB_NET_FUNCTION=rndis.0
fi
We can change this variable with fw_setenv. This is written persistently in the NOR flash.
# fw_setenv usb_ethernet_mode ecm
This will make the Pluto use ECM rather than RNDIS for the usb0 interface. In my case, I also want to change the IP address of the usb0 interface to match the network that Android uses for USB tethering. This can be done with
# fw_setenv ipaddr 192.168.89.1
Excellent work and writeup!!
so now we have our plutos connected to our tablets and phones but what now? the only software is sdrangel but that doesn’t seem to see the pluto.
I wrote this post while working on Maia SDR. Since Maia SDR only needs a web browser, a phone or table can be used as the user interface, as you can see in the demo video.